CVEDIA-RT Plugin for Milestone XProtect - Setup Guide
This guide is designed for technical users responsible for installing, updating, and maintaining the CVEDIA-RT Plugin integration with Milestone XProtect systems.
The integration of CVEDIA-RT with Milestone XProtect is facilitated through the CVEDIA-RT XProtect Pugin and the CVEDIA-RT XProtect Connector Service.
The CVEDIA-RT XProtect Plugin extends both the XProtect Management Client and XProtect Smart Client interfaces. It is installed via a lightweight, dedicated installer and should be deployed on any workstation where users need to:
- Manage licenses
- Configure analytics settings
- Access the Smart Events filter for forensic search
This plugin enables interaction with CVEDIA-RT's AI analytics directly from the familiar Milestone XProtect interface.
The CVEDIA-RT XProtect Connector Service is responsible for communication between the Milestone XProtect system and the CVEDIA-RT Servers, that perform the actual AI inference tasks. This service should be installed on the Milestone XProtect Management Server.
Note
The CVEDIA-RT XProtect Plugin and Connector Service should be installed only on a single XProtect Management Server. Multiple installations on different XProtect Management Servers within the same Milestone XProtect environment are not yet supported.
Architecture Overview
The CVEDIA-RT Plugin for Milestone XProtect operates by connecting the XProtect VMS to one or more CVEDIA-RT Servers that handle AI inference.

All-in-One Deployment
For testing or small-scale deployments, you can install the CVEDIA-RT Plugin, Connector Service, and CVEDIA-RT Server on the same machine as the Milestone XProtect Management Server, provided that the hardware meets the necessary requirements.
Requirements
CVEDIA-RT RT Server
- Appropriate CVEDIA licensing
Milestone XProtect
- XProtect Express+, XProtect Professional+, XProtect Expert, and XProtect Corporate from 2023 R2 to 2025 R3.
- All available patches installed.
Important
The CVEDIA-RT plugin utilizes one XProtect device license. This license is allocated for a Metadata Device that is created to stream bounding box data generated by the analytics.
Supported Decoders
- "video/h264" for H264 streams
- "video/hevc" for H265/HEVC streams
Initial Setup Requirements
CVEDIA-RT plugin is compatible with XProtect Express+, XProtect Professional+, XProtect Expert, and XProtect Corporate from 2023 R2 to 2025 R3.
Before proceeding to further steps, please make sure you have a compatible version and license of XProtect software installed on your machine.
Notes
Please check https://www.milestonesys.com/products/software/xprotect-comparison/ to learn more about the different variants of Milestone XProtect software.
Create a Dedicated User
CVEDIA-RT AI Analytics integration requires a dedicated administration user account in Milestone XProtect VMS to communicate with CVEDIA analytics engine and to automate the configuration of the system.
-
On the target system, open the XProtect Management Client and sign in with administrator credentials. In the tree view on the left, choose Security > Basic Users and right-click on the Basic User view to bring up the context menu.

-
Choose Create Basic User and specify the user name and password.
Make sure the "Force Basic User to change password" checkbox is NOT checked.

-
Navigate to Security > Roles in the tree view on the left and select "Administrators" role. Press the "Users and Groups" button to view assigned users:

-
Press "Add" to select the previously created user and assign them to the Administrator role.
Once you complete these steps, you can proceed to install the CVEDIA-RT AI Analytics Plugin.
Installation and Activation
Components Overview
The CVEDIA-RT integration for Milestone XProtect consists of three primary components:
CVEDIA-RT Plugin for XProtect
A lightweight plugin that extends both the XProtect Management Client and XProtect Smart Client interfaces.
CVEDIA-RT XProtect Connector Service
A background service that manages communication between Milestone XProtect and the CVEDIA-RT Servers.
CVEDIA-RT Servers
The core AI engine responsible for real-time video analytics.
CVEDIA-RT Servers can be deployed on any compatible device within the same local area network (LAN).
For testing or small-scale deployments, you can also install CVEDIA-RT Server, and all the other components on the same machine as the Milestone XProtect Management Server, assuming the hardware meets the necessary requirements.
Deployment options:
- CVEDIA AI Appliances — Pre-configured hardware with drivers, licenses, and CVEDIA-RT Server ready to use. Recommended for most deployments. See the AI Appliance documentation.
- CVEDIA-RT Server on Windows or Linux — Install on your own hardware for custom deployments or integration with existing infrastructure. Choose one of the following install guides based on the requirements:
- Setting up on a Windows Machine – Installing RT Server on Windows
- Setting up on a Linux Machine – Installation process for Linux
Installation
Before proceeding with the installation, ensure that you have one or more CVEDIA-RT Servers set up and running on your network.
You will be able to manage the licenses on the CVEDIA-RT Servers using the XProtect Management Client after completing the installation of the CVEDIA-RT Plugin.
-
Create an admin user
As described in the Initial Setup Requirements.
-
Download the CVEDIA-RT XProtect Connector Installer
The installer can be found at https://rt.cvedia.com/Milestone.
For simplicity, we recommend installing the Connector directly on the Milestone XProtect Management Server. This ensures that the Connector Service will be able to communicate with the XProtect Management Server and with the XProtect Recording Servers without network restrictions.
If you choose to install the Connector on a different machine, ensure that it has network access to both the Milestone XProtect Management Server and the CVEDIA-RT Servers. Please check the troubleshooting section in case of connectivity issues.
-
Run the Installer
Double-click the downloaded installer file to launch the installation wizard.
Follow the on-screen instructions to complete the installation process.
-
RT Server Installtion (optional)
During the installation, you will be prompted to choose whether to install the CVEDIA-RT Server on the same machine as the Connector.
- If you already have one or more CVEDIA-RT Servers running on your network, you can skip this step.
- If you want to install the CVEDIA-RT Server on the same machine, select "Download and install RT Server on this machine".

-
Provide XProtect User Credentials and XProtect Management Server Address
When requested, provide the credentials for the dedicated Milestone XProtect user you created earlier.

-
Use the Admin User created in the setup phase.
-
Input the Address of the XProtect Management Server. You can specify the IP address or the XProtect Server Address, but it's preferred to use the server address.
Note
The Address of the XProtect Management Server can be found in XProtect Management Server -> Server Configurator -> Registering Servers Tab
-
-
Configuration Validation
The installer will confirm that the credentials are valid and that the CVEDIA-RT Xprotect Connector service has started successfully.
If the authentication fails, please step back to the previous screen, verify the provided credentials and ensure that the user has administrator privileges, and try again.
-
Additional workstations
If you have additional workstations where the XProtect Management Client or XProtect Smart Client is used, you should install the CVEDIA-RT Plugin using the "Installer for XProtect Clients" from https://rt.cvedia.com/Milestone.
Command Line Installation
If you need to run the installer without user interaction (for example, for automating deployments), you can use the command line from the Windows Terminal.
Using start /wait
Always use start /wait "" before the installer command to ensure the command prompt waits for the installation to complete before continuing. This is important due to UAC elevation.
Connector Only (Distributed Deployment)
To install only the Connector and Plugin without the RT Server:
start /wait "" "CVEDIA-RT-XProtect-Connector-And-Client-Setup-2026.1.0.exe" /VERYSILENT /MANAGEMENTSERVER=http://192.168.1.100 /USER=admin /PASSWORD=yourpassword
Connector with RT Server (All-in-One)
To install the Connector, Plugin, and automatically download and install the RT Server:
start /wait "" "CVEDIA-RT-XProtect-Connector-And-Client-Setup-2026.1.0.exe" /VERYSILENT /RTSERVER=install /IPBINDING=0.0.0.0 /MANAGEMENTSERVER=http://192.168.1.100 /USER=admin /PASSWORD=yourpassword
Connector with RT Server (No Trial Activation)
To install the Connector, Plugin, and RT Server without activating the trial license:
start /wait "" "CVEDIA-RT-XProtect-Connector-And-Client-Setup-2026.1.0.exe" /VERYSILENT /RTSERVER=install /IPBINDING=0.0.0.0 /TRIAL=false /MANAGEMENTSERVER=http://192.168.1.100 /USER=admin /PASSWORD=yourpassword
Command Line Options
| Parameter | Values | Default | Description |
|---|---|---|---|
/SILENT |
- | - | Show progress UI but proceed automatically |
/VERYSILENT |
- | - | Hide UI completely |
/RTSERVER |
skip, install |
skip |
Download and install RT Server |
/IPBINDING |
IP address | - | IP binding for RT Server (if installing) |
/TRIAL |
true, false |
true |
Activate trial license after RT Server installation. Use /TRIAL=false to skip trial activation |
/MANAGEMENTSERVER |
URI | http://127.0.0.1 |
XProtect Management Server URI |
/USER |
username | - | Milestone XProtect user |
/PASSWORD |
password | - | Milestone XProtect password |
/SECURE |
true, false |
false |
Use HTTPS for connection |
/LOG |
filename | - | Create installation log file |
IP Binding Options
The /IPBINDING parameter controls which network interfaces the RT Server listens on:
127.0.0.1- Local connections only (for All-in-One deployments)0.0.0.0- All network interfaces (required for distributed deployments)- Specific IP - Bind to a specific network interface
Client-Only Installation
For workstations that only need the XProtect Smart Client or XProtect Management Client plugin (no Connector):
start /wait "" "CVEDIA-RT-XProtect-Plugin-Client-Setup-2026.1.0.exe" /VERYSILENT
License Management
You can activate and deactivate new CVEDIA-RT licenses from within the XProtect Management Client by navigating to the MIP Plug-ins / CVEDIA-RT Plugin page.

The operation of activating a new license key may require a few seconds. You can refresh the XProtect Management Client page by pressing F5 to check if the changes have been applied.
If you didn't choose to activate a trial license during installation, you can also do this here by clicking on the Activate Trial License button.
Notes
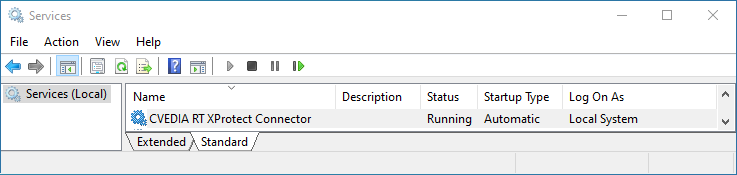
CVEDIA-RT XProtect Connector service needs to be running for license management to work correctly. You can check if the service is running via the Windows Services application.
License Status Panel
You can check the licensing status from within the XProtect Smart Client by navigating to the Camera / Pressing the CVEDIA logo in the top right corner.

Enable the Analytics on the camera to connect to a CVEDIA-RT Server and click "OK". Then open the CVEDIA panel again to check the license status.

Notes
- This operation will increase the number of active AI channels. Please make sure your plugin license key covers the number of channels you wish to activate.
- If the "Enable analytics" switch is toggled off, the stream is ignored and not counted toward the limits of the license.
- No License Found - The panel shows Status: No license keys found, indicating that no valid license has been added to the system. As a result, Analytics can still be configured but remain inactive until a valid license is added.

- License Active and Within Limits - The panel shows Status: OK, confirming that the configured Analytics are within the existing license limits.

- License Exceeded - The panel shows Status: Too many streams, indicating that the number of configured Analytics has exceeded the maximum allowed by the license(s).

CVEDIA-RT Server Connection, Naming and Scalability
When the analytics are enabled for a camera, the plugin uses the selected group to route the inference requests to the appropriate CVEDIA-RT Server.
Each CVEDIA-RT Server is assigned the default name.
The CVEDIA-RT Server name is used as a group identifier, and multiple servers can be deployed under the same name to create a scalable cluster of inference devices.
If you have multiple CVEDIA-RT Servers with different names, they will be listed separately in different groups. This is particularly useful in cases where different license types or performance levels are required for various tasks.
The plugin will automatically discover all CVEDIA-RT Servers with the same name on the network and distribute the inference workload across them. This allows for load balancing and failover support, ensuring high availability and optimal performance.
When multiple CVEDIA-RT Servers share the same name, the CVEDIA-RT Connector:
- Automatically discovers all servers with that name on the network
- Distributes inference workloads across the entire group
- Routes requests based on available licenses across devices
- Migrates the workload to a different server if one becomes unavailable
- Immediately includes a newly added server without configuration changes
IP Override
There could be scenarios where you may want to bypass the server name resolution and directly assign the inference for a camera stream to a specific server. This is where the IP override feature comes into play.
This feature may be useful when the CVEDIA-RT Server is not discoverable in the local network, or when you want to ensure that a specific server is used for inference regardless of the server's group.
To configure an IP override:
-
In the Analytics tab, navigate to Global Settings and enable Expert Mode
-
Once Expert Mode is enabled, the Expert tab will appear. Here you can specify an IP address to bypass server name resolution and directly assign the inference instance to a specific server.
Analytics Status Identifier
Once Analytics is configured, the Analytics Status Indicator will display whether it was set up successfully [✓] or otherwise [✕]. If Analytics is not configured, no status will be shown.

For the License Plate Recognition (ALPR) analytics, a warning will appear if the license does not include ALPR support.
User Access Management
This feature allows administrators to control who can view or modify analytics settings by assigning permissions through Milestone XProtect Management Client roles. This ensures per-user access control, helping maintain system integrity and compliance with organizational policies.
To manage user access to CVEDIA-RT Plugin analytics settings, follow these steps:
-
Milestone XProtect Management Client -> Roles -> Security-Roles Settings -> CVEDIA-RT Plugin tab

-
Milestone XProtect Management Client -> Roles -> Overall Security -> CVEDIA-RT Plugin
Important
Managing access through the Overall Security is only available in the Corporate version of Milestone XProtect.

Users who do not have permission to view the CVEDIA-RT Plugin analytics setup will encounter the following pop-up when attempting to open it.

Users who have permission to View the plugin analytics setup, but not to Edit it, will see the window in read-only mode. No options to modify or save changes will be available.

Advanced Configuration
This section provides details about advanced configuration options designed for XProtect system administrators. While these settings are not necessary if the installation and initial configuration have been successfully completed, they can be useful for addressing specific or specialized use cases.
User Credentials
If you need the integration to use a different XProtect user, you can update the credentials directly through the command line without editing any configuration files.
Follow these steps:
-
Stop the CVEDIA-RT XProtect Connector service:
Ensure the CVEDIA-RT XProtect Connector service is stopped via the Windows Services application before proceeding.
-
Open an Administrative Command Prompt:
- Navigate to the folder where the integration is installed:
C:\ProgramData\CVEDIA\CVEDIA-RT-XProtect-Plugin\Server\files\MilestoneController- Open a command prompt session with administrative privileges in this directory.
-
Update the Credentials:
Use the following command format to update the credentials:
.\RTController.exe -c -u <username> -p <password> -a <method> -s -m <server_uri> -r -i <remote_ip>Example: Changing Credentials for Local Setup
Below is an example command to configure the system to use the basic XProtect user TestUser, with both the XProtect server and CVEDIA-RT running on the local machine:
.\RTController.exe -c -u TestUser -p Password123! -a Basic -m http://localhostSee the table below for detailed information about each parameter.
-
Verify and Save:
The application will attempt to log in to the XProtect system using the specified credentials. If the login is successful, the new settings will be saved and used automatically in future sessions.
-
Final Step:
Restart the CVEDIA-RT XProtect Connector service in the Windows Services application.
Parameters Reference Table
The following table provides details about the parameters used with the RTController.exe command to update XProtect user credentials
| Parameter | Required | Description |
|---|---|---|
| -c | YES | Runs the XProtect Connector in credential setting mode. |
| -u username | YES | Specifies the new user name that should be used |
| -p password | YES | Specifies the password for new user |
| -a method | YES | Authentication method to use when logging into XProtect. Basic is the only supported value. |
| YES | Specifies the URI of the XProtect Management Server to use (eg. http://localhost) | |
| -s | NO | Optional parameter that enforces using a secure connection when connecting to XProtect. Depending on your system setup, this might have to be used in order to correctly log into XProtect VMS. |
| -r | NO | Optional parameter that enables CVEDIA-RT remote mode. Should not be used unless you have CVEDIA-RT running on a different server |
| -i remote_ip | NO | Optional parameter specifying the IP to use for the remote CVEDIA-RT server. Can be used only when using the -r parameter above. If the IP is not specified, the CVEDIA-RT server will be auto discovered in the network |
Firewall Configuration
The CVEDIA-RT XProtect Connector service requires network access to both the Milestone XProtect Management Server and the CVEDIA-RT Servers.
The installer automatically configures Windows Firewall rules to allow the necessary communication:
| Rule Name | Direction | Protocol | Port | Description |
|---|---|---|---|---|
MetaStream_Allow_TCP_53682 |
Inbound | TCP | 53682 | Metadata stream communication |
RemoteMode_Allow_UDP_50000_In |
Inbound | UDP | 50000 | Remote mode discovery |
RemoteMode_Allow_UDP_50000_Out |
Outbound | UDP | 50000 | Remote mode discovery |
These rules are automatically removed when the plugin is uninstalled.
Updating
- Check for new plugin versions on the official website: <https://rt.cvedia.com/Milestone>
- Ensure you have the same version of the CVEDIA-RT XProtect Connector Service, the CVEDIA-RT XProtect Plugin, and the CVEDIA-RT Servers for compatibility.
- Update first the CVEDIA-RT Servers.
- Before running the installer to update to a new release of the CVEDIA-RT Plugin, make sure to close the XProtect Smart Client and the XProtect Management Client.
- All configured settings and applied licenses will be preserved.
Uninstalling
- Close the XProtect Smart Client and the XProtect Management Client.
- Open Settings: press Windows key + I or click the Start menu.
- Go to Apps: click on Installed Apps and find the CVEDIA-RT XProtect Plugin or the CVEDIA-RT XProtect Connector Service in the list.
- Uninstall the Plugin: select CVEDIA-RT XProtect Plugin or the CVEDIA-RT XProtect Connector Service and click Uninstall. Confirm if prompted.
- If prompted, restart your computer to complete the process.
Warning
After uninstalling the plugin, the Metadata Device must be manually deleted from one of the recording servers. If not removed, it will continue to consume one device license from XProtect.
Technical Support
For comprehensive technical support information, including troubleshooting guides, log file locations, and reporting procedures, please refer to our Technical Support Documentation.
Key support resources:
- System troubleshooting guides
- Log file collection procedures
- Hardware diagnostics
- Performance optimization
- Bug reporting workflows
For immediate assistance, you can also submit a support request through the CVEDIA Tech Support Portal.